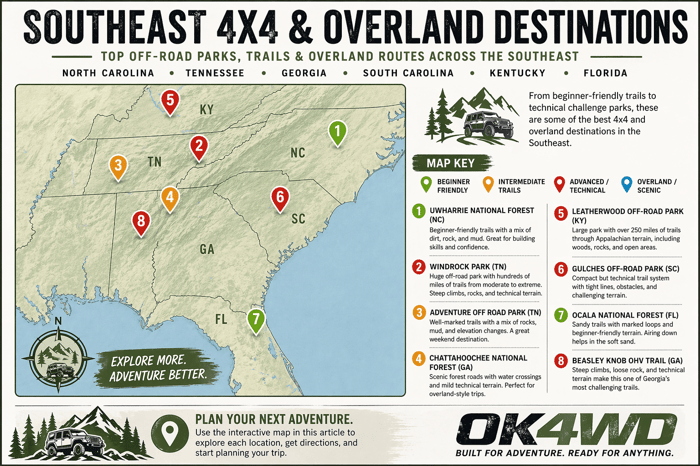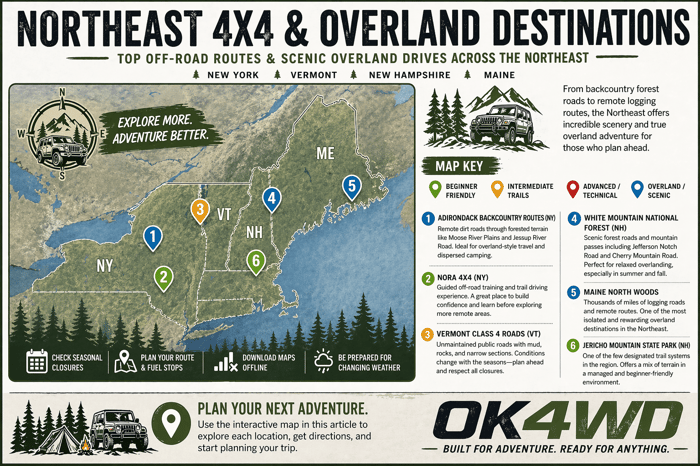
How to Air Down Tires Properly for Off-Roading
If you’re new to off-roading or overlanding, you’ve probably heard people talk about “airing down” their tires before hitting the trail.
It might sound like a small adjustment, but airing down is one of the most effective (and easiest) ways to improve traction, ride comfort, and overall capability off-road.
In this guide, we’ll break down exactly how to air down your tires properly, what tire pressures to aim for, and what tools make the process faster and safer.
Why Do Off-Roaders Air Down Tires?
“Airing down” simply means reducing your tire pressure from normal street levels (usually 32–40 PSI) to a lower PSI better suited for trail conditions.
When you lower tire pressure, your tire becomes more flexible and creates a larger contact patch on the ground.
That gives you:
Better traction on loose surfaces
Improved grip on rocks and uneven terrain
A smoother ride over washboard roads
Less bouncing and trail impact
More control at low speeds
It’s one of the cheapest performance upgrades you can make—no new parts required.
What PSI Should You Run Off-Road?
There isn’t one perfect tire pressure for every vehicle, but there are good starting ranges depending on terrain.
Most off-roaders running all-terrain tires in the 33–35” range will land somewhere in these zones:
Rocks (Crawling & Technical Trails)
15–20 PSI
Lower pressure helps the tire conform to rocks and improves grip.
Sand (Beach or Dunes)
12–18 PSI
Sand requires maximum flotation. Airing down helps prevent digging in.
Mud
18–25 PSI
Mud is tricky—you want traction but not so low that the tire can’t clear itself.
Gravel Roads & Overland Trails
20–28 PSI
For long dirt roads, slightly reduced pressure smooths out the ride without going too low.
Quick Note:
Heavier vehicles (fully loaded overland rigs) may need slightly higher PSI than lighter rigs.
When in doubt, start higher and adjust gradually.
Step-by-Step: How to Air Down Tires Properly
Airing down is simple, but doing it correctly makes a big difference.
Step 1: Pull Off the Trail Safely
Before you start, make sure you’re parked somewhere level and out of the way.
Step 2: Remove the Valve Stem Cap
Keep caps somewhere safe—you don’t want to lose them in the dirt.
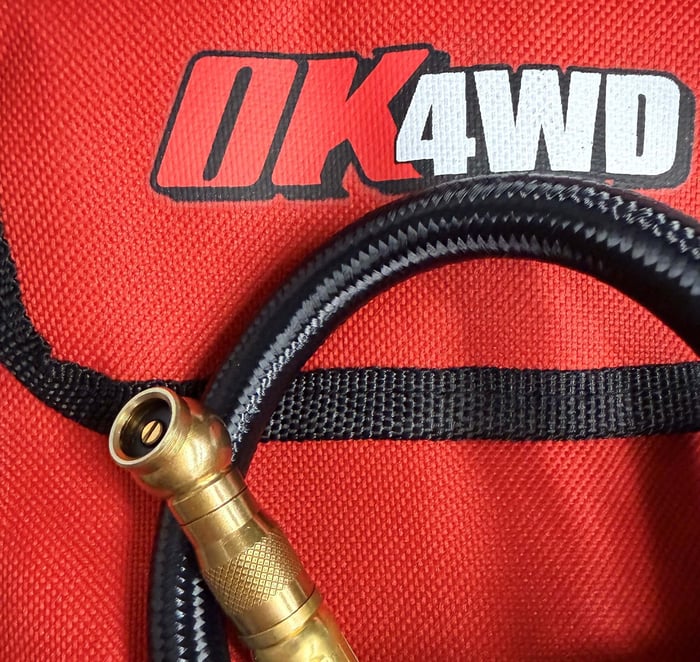
Step 3: Use a Tire Deflator Tool
While you can press the valve stem manually, it’s slow and inconsistent.
A dedicated tire deflator makes the process faster and more accurate.
Many off-roaders use:
Preset deflators
Adjustable rapid deflators
Digital deflation tools
(These are small, affordable tools that make airing down way easier.)
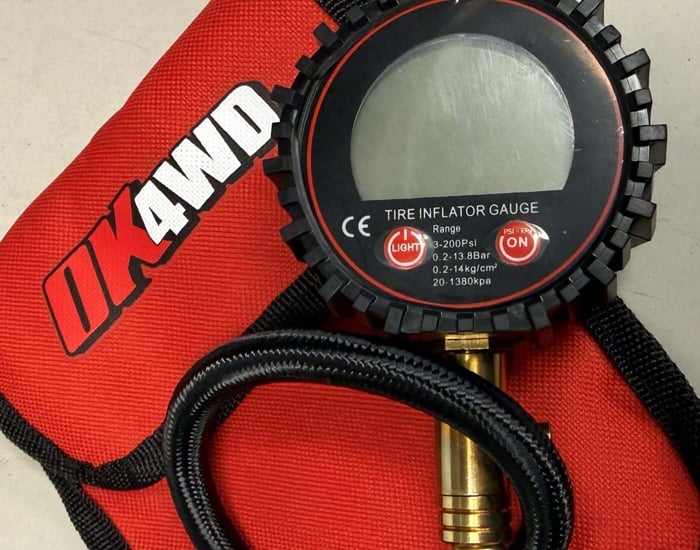
Step 4: Check Pressure with a Reliable Gauge
Don’t guess. Tire pressure changes quickly.
Use a quality tire gauge to confirm you’re hitting your target PSI.
Step 5: Repeat on All Four Tires
Make sure each tire is aired down evenly.
Uneven pressures can affect handling and traction.
Step 6: Inspect Sidewalls Before Driving
Once aired down, take a quick look at your tires:
No cracks or damage
No excessive bulging
Be aware of sharp rocks or roots
How Low Is Too Low?
This is one of the most common questions.
Going too low can increase the risk of:
Debeading a tire (tire coming off the wheel)
Sidewall damage
Poor steering response
For most standard wheels (non-beadlock), it’s generally smart to avoid dropping below:
12 PSI on most setups
Slightly higher if your rig is heavy
Beadlock wheels allow you to safely run much lower pressures, but they’re typically for more extreme use.
Don’t Forget: You MUST Air Back Up
Airing down is only half the process.
Driving on pavement at trail pressures is dangerous and can cause:
Excessive heat buildup
Poor braking performance
Tire damage
Blowouts at speed
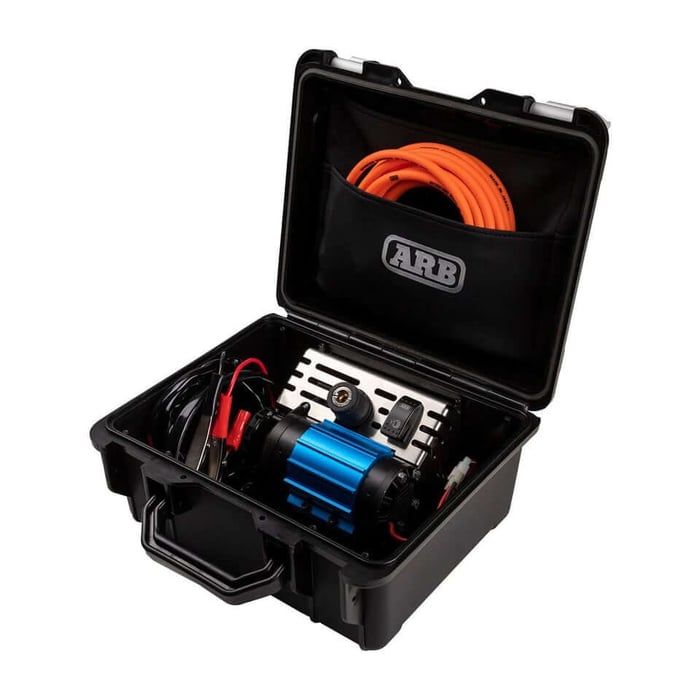
That’s why carrying an air source is essential.
Popular options include:
Full onboard air systems (great for frequent off-roaders)
Pro Tip: Add the multi tire inflate/deflate kit to your setup for even more convenience (compatible with ARB compressors and other air sources)
If you’re overlanding regularly, having a reliable compressor is one of the best investments you can make.
Common Airing Down Mistakes to Avoid
Even experienced drivers slip up sometimes. Here are a few common errors:
Airing down too far without knowing your wheel setup
Forgetting to air back up before heading home
Using an inaccurate gauge
Running uneven PSI side-to-side
Airing down for speed instead of traction (low PSI is for slow trail driving)
FAQ: Airing Down Tires for Off-Roading
Can I air down stock tires?
Yes. Even stock tires benefit from reduced pressure on dirt, sand, and rocky trails.
Does airing down damage tires?
Not when done properly. In fact, it can reduce trail impact. Just don’t drive fast while aired down.
How long does it take?
With the right tools, airing down takes about 5–10 minutes.
Do I need beadlocks?
Not for most recreational off-roading. Beadlocks are typically for extreme low-pressure rock crawling.
Should I air down for snow?
Often yes—snow behaves a lot like sand. Moderate airing down can improve traction.
Final Thoughts
Airing down is one of the easiest ways to instantly improve your vehicle’s off-road performance.
With the right pressure, the right tools, and a good air-up plan, you’ll get:
Better traction
A smoother ride
More confidence on the trail
If you’re building out your off-road kit, having a dependable tire deflator, pressure gauge, and air compressor will make every trip easier and safer.